Role-Based Access Control
CodeXray's Role-Based Access Control (RBAC) governs what each user can do inside a tenant. The right people see and change the right things — and nothing they shouldn't.
- Multi-tenancy isolates data between tenants (see Authentication & Multi-Tenancy)
- RBAC controls what users do within a tenant — viewing, editing, configuring
Where to Find It
User and role management lives under Settings → Users in the main sidebar.
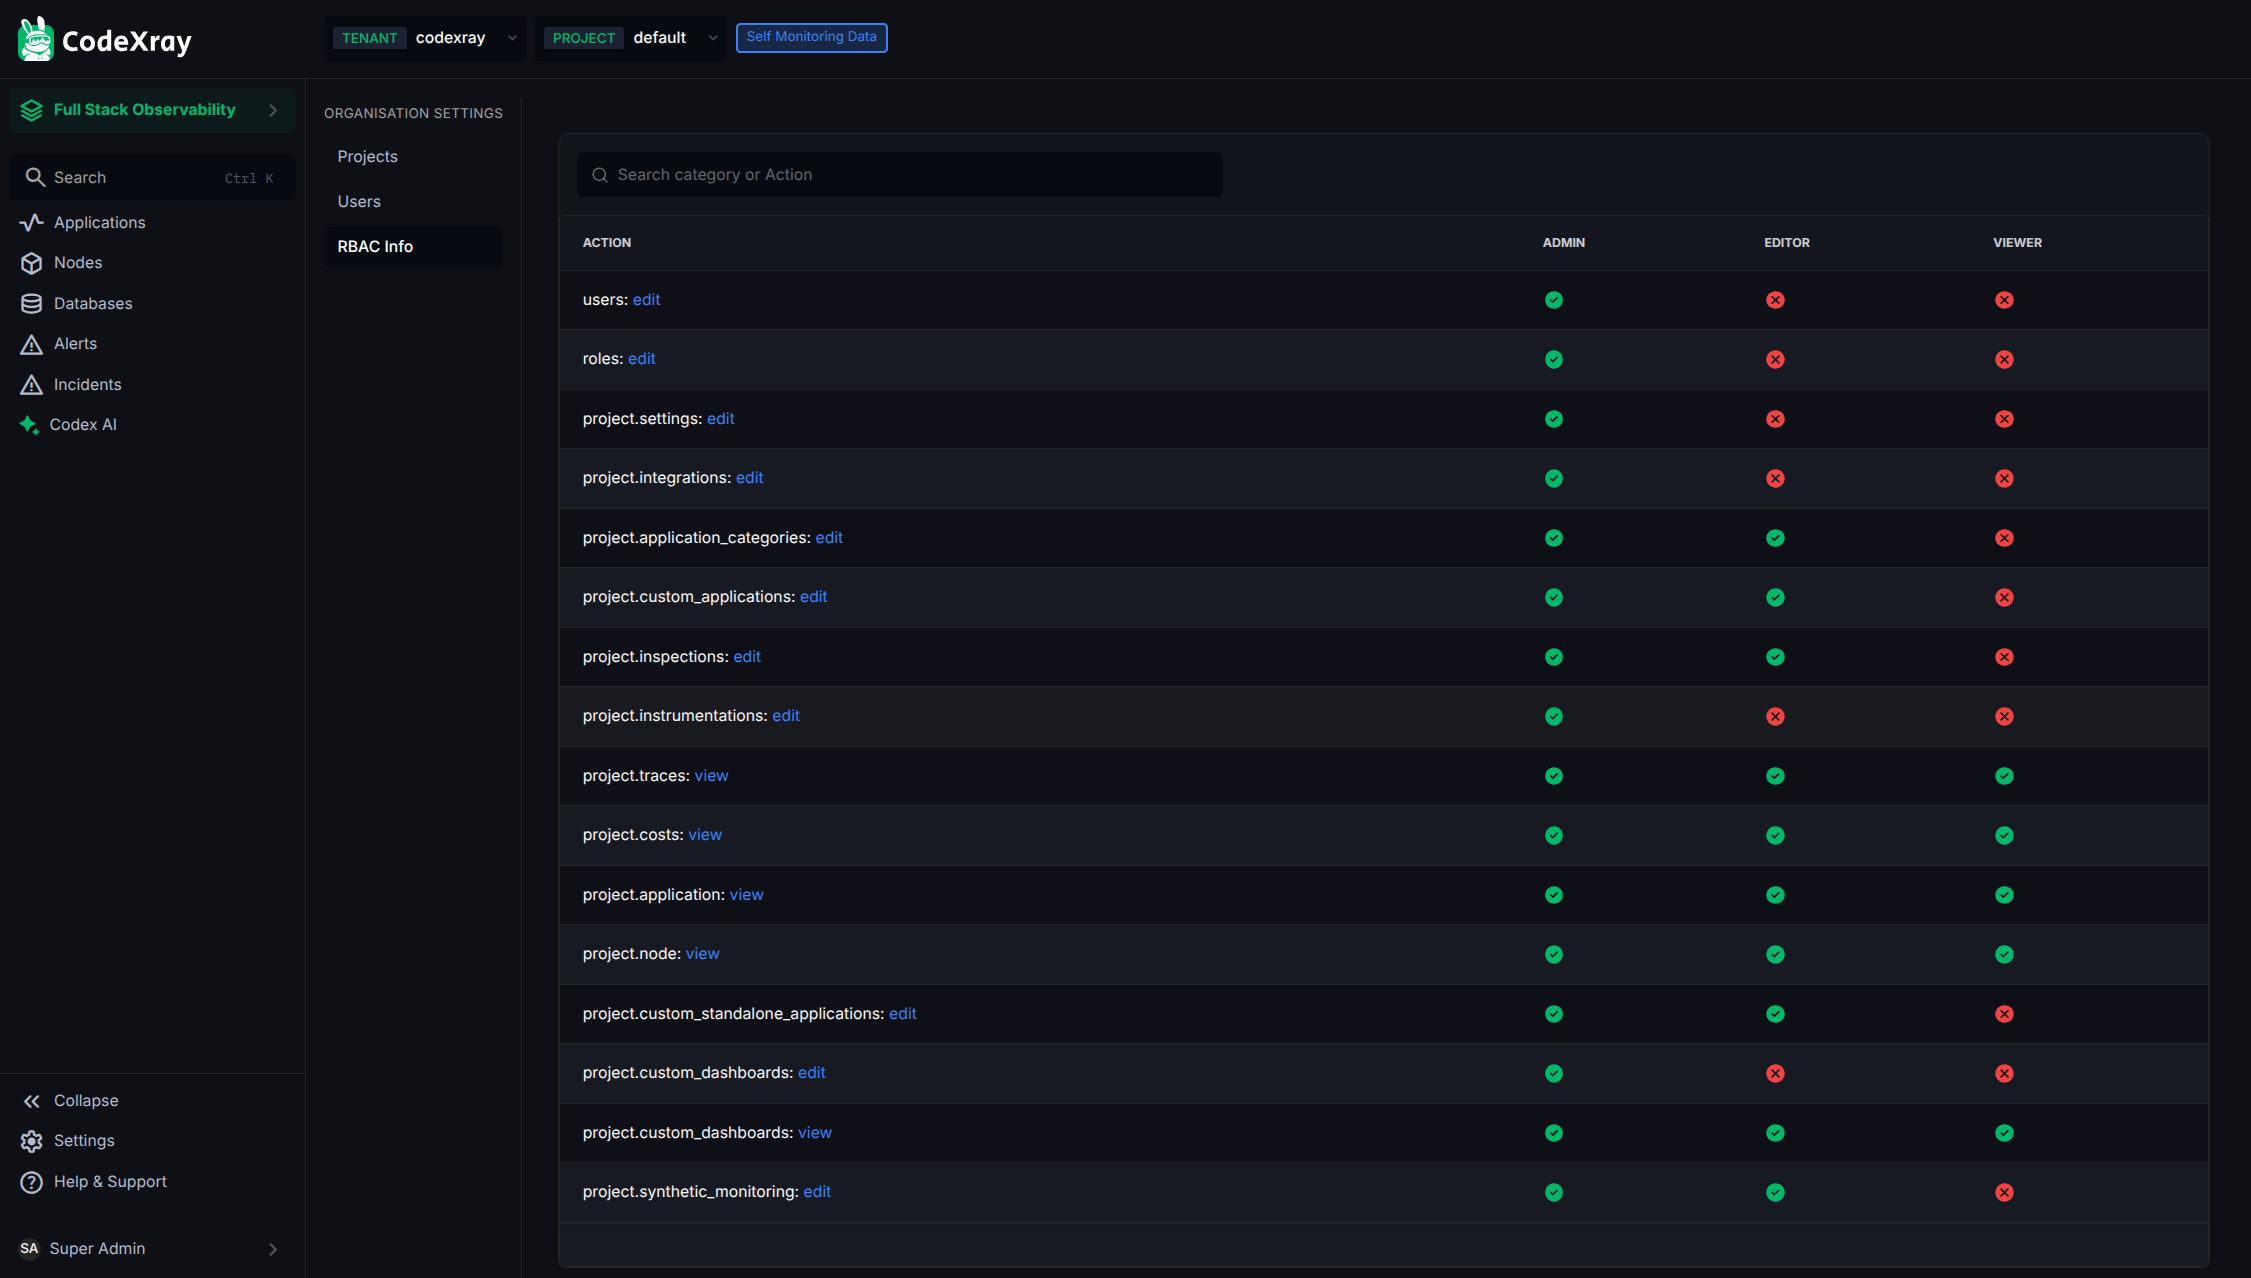
The page shows every user in the current tenant, the role assigned to each, and actions to add, edit, or remove them.
Built-in Roles
CodeXray ships with three default roles. They cover most teams without needing customisation:
| Role | What it can do | Typical use |
|---|---|---|
| Admin | Everything — manage users, projects, integrations, API keys, and edit every configuration | Platform leads, on-call engineers, security admins |
| Editor | View all data + edit configurations (alerts, application categories, custom applications, dashboards) | SREs, DevOps engineers, senior developers |
| Viewer | Read-only access — view every page but cannot change configurations or save edits | Developers, support engineers, leadership |
Each role applies within the tenant the user belongs to. A user with Admin in Tenant A has zero visibility into Tenant B unless they're invited there as a separate identity.
Adding a User
Click + Add User from the user-list page. The form collects the basics.
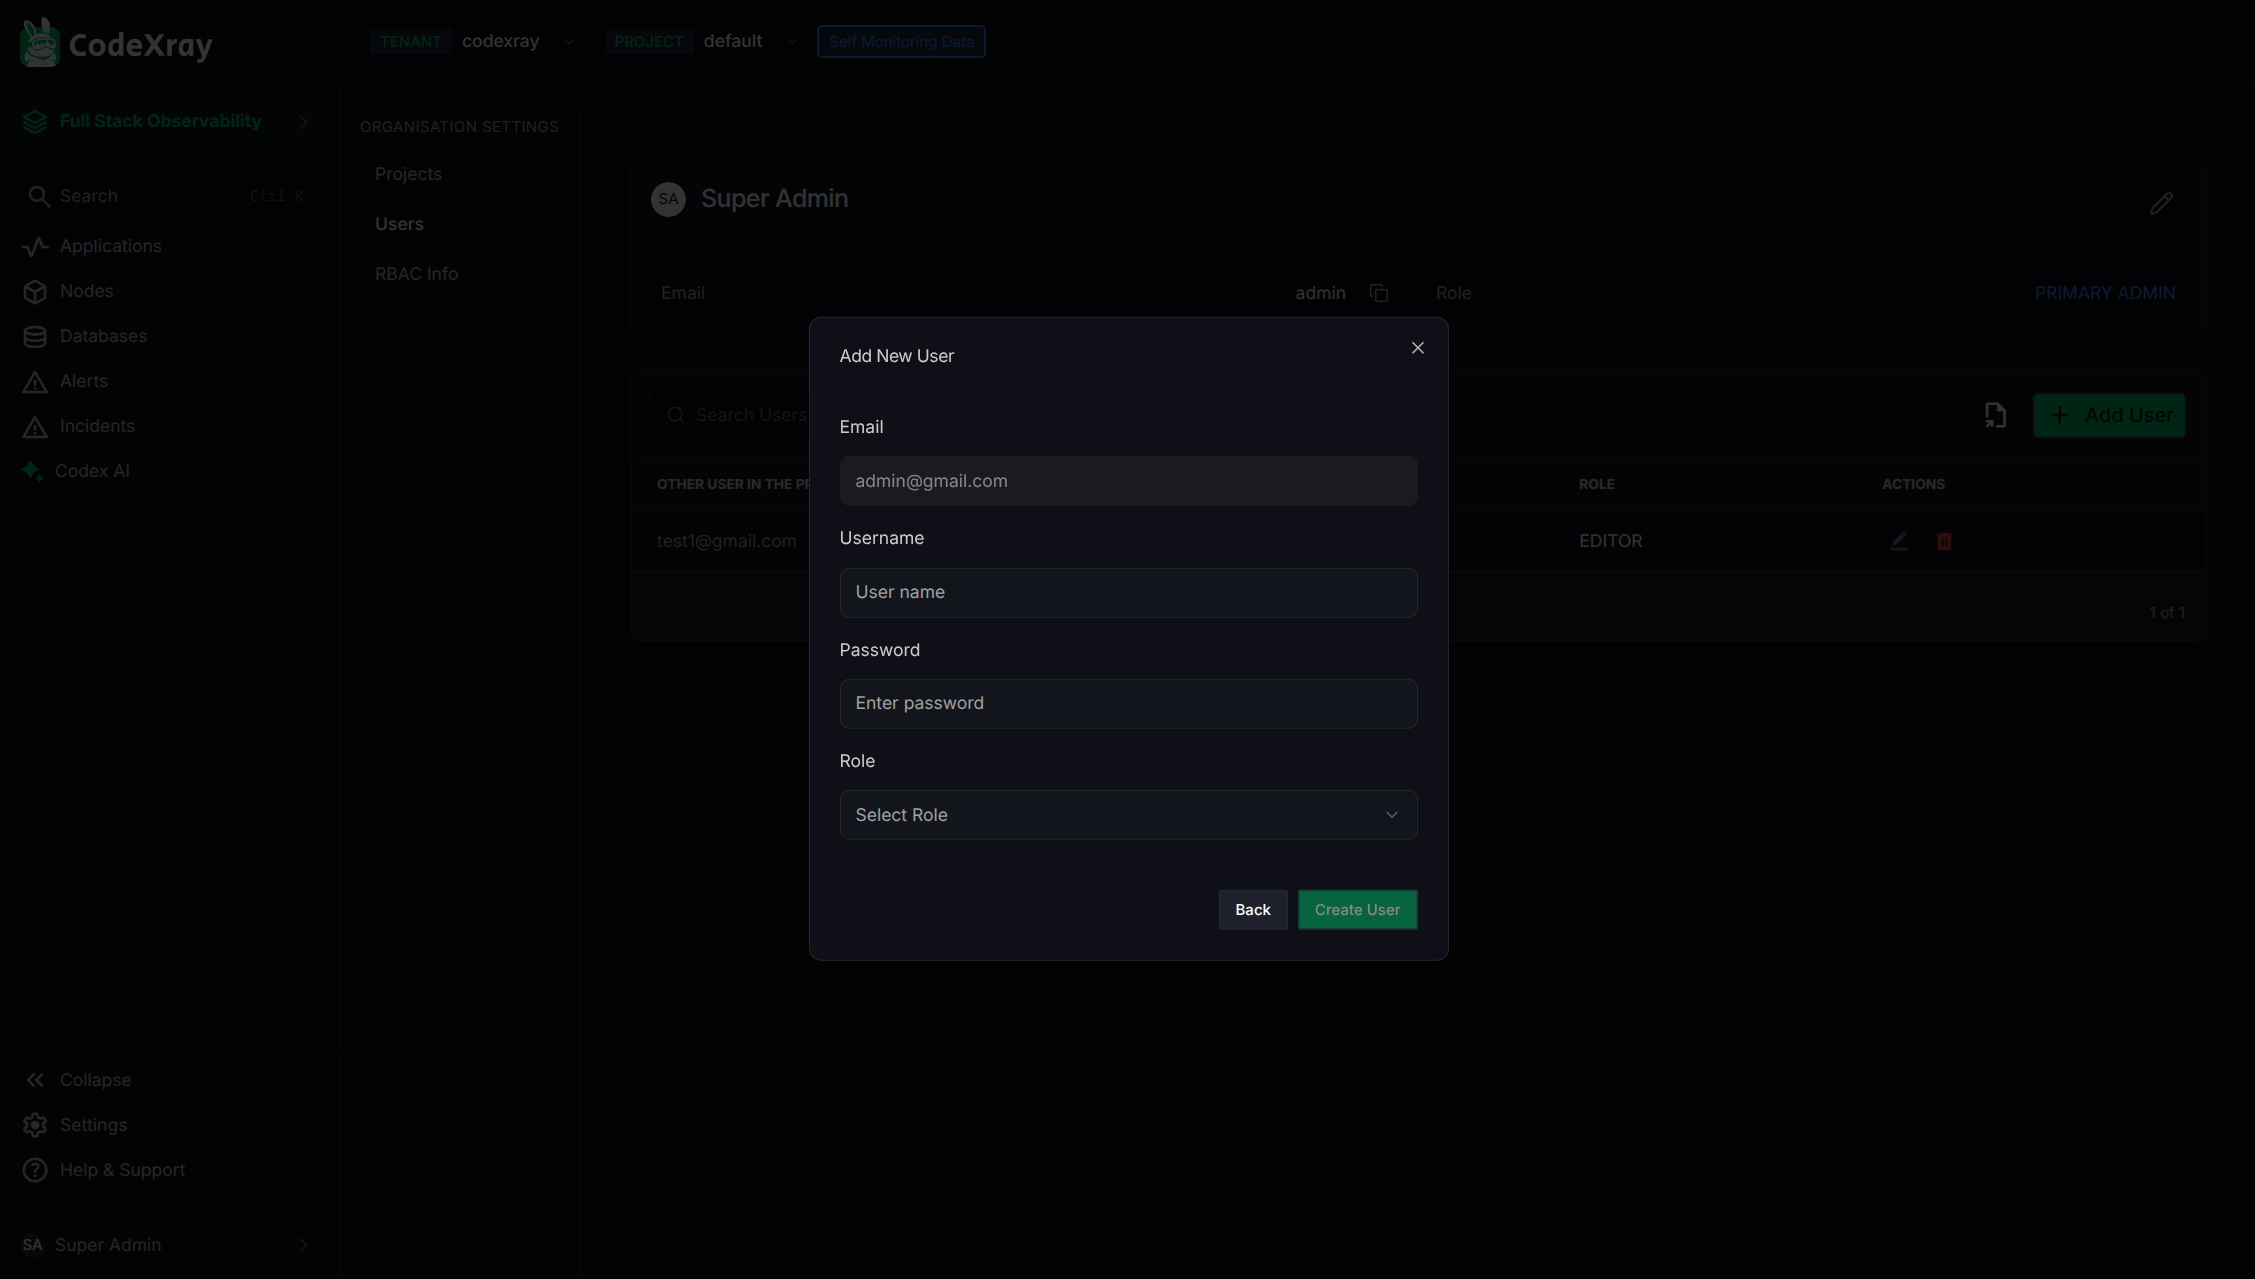
Fields:
| Field | Notes |
|---|---|
| The user's login email. Must be unique within the tenant. | |
| Name | Display name shown across the UI (audit logs, comments, etc.) |
| Password | Initial password — the user is prompted to change it on first login |
| Role | One of Admin, Editor, or Viewer |
Once submitted, the user is created and can sign in immediately with the credentials you set.
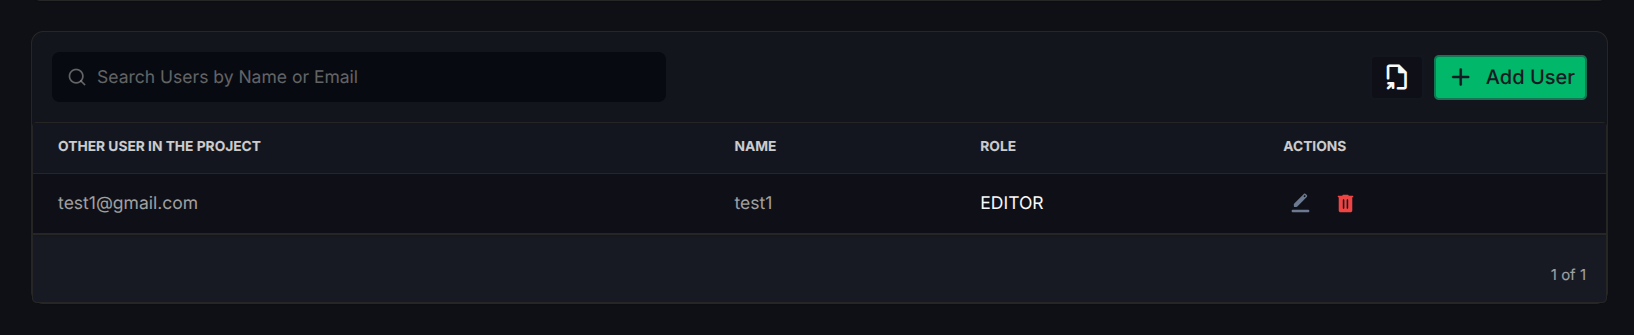
You'll usually want to share the new credentials with the user via a secure channel (a password manager invite, encrypted email, or a brief in-person handoff). They should change the password on first login from the Change Credentials flow.
Editing a User's Role
Promotions and demotions happen from the same user-list page — find the user, click the edit action, and pick the new role.
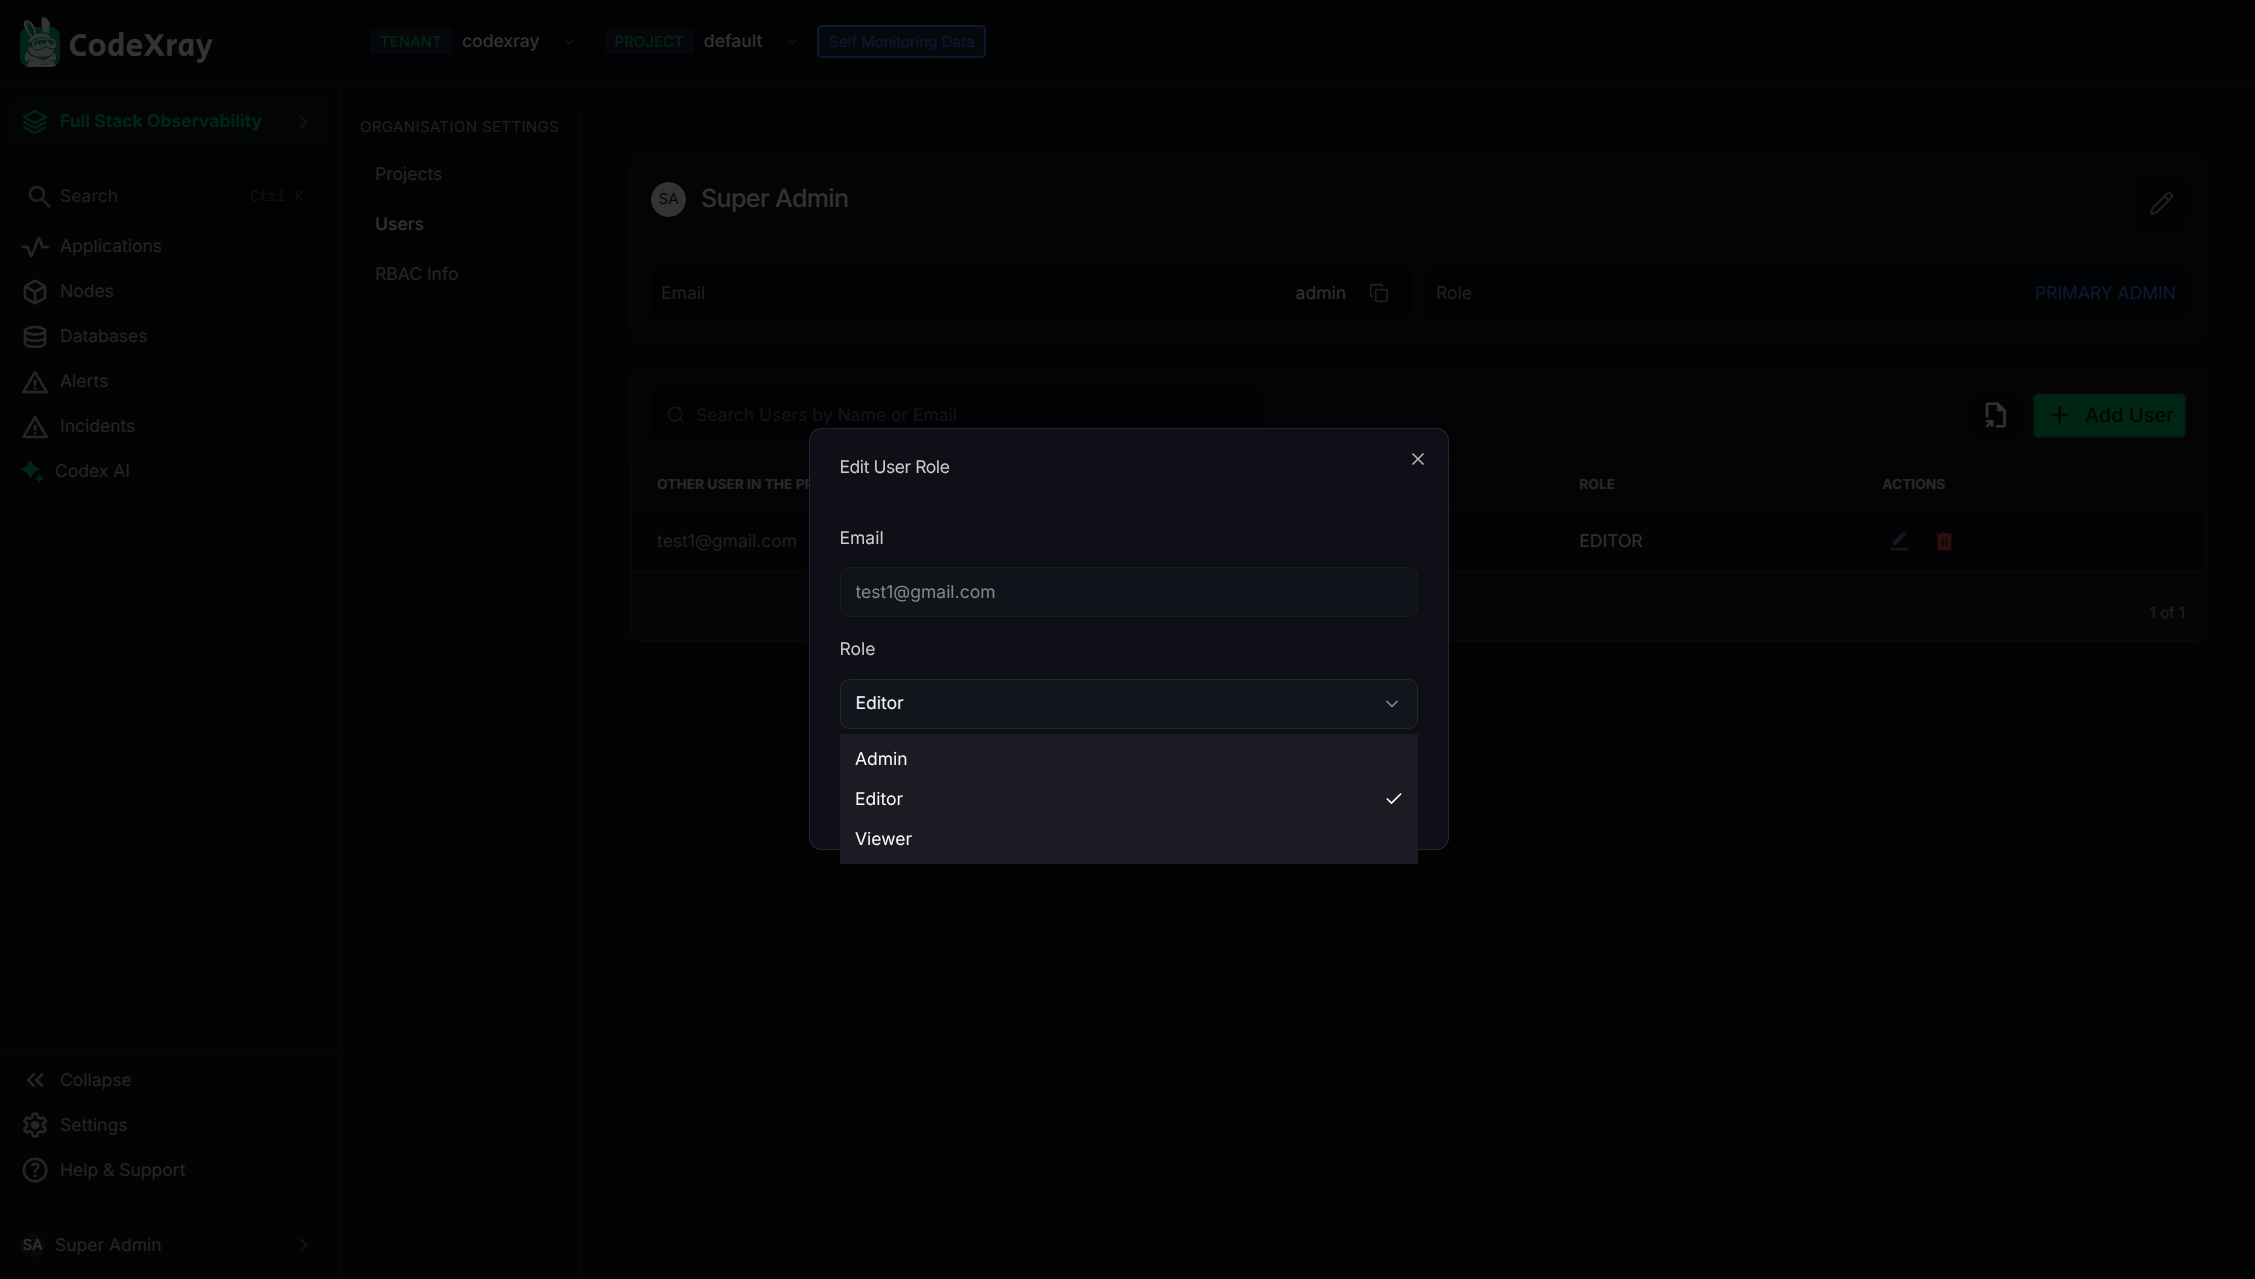
Role changes take effect on the user's next request — they don't need to sign out and back in. The platform re-checks permissions on every API call, so a promotion is live within seconds.
The UI prevents the last Admin in a tenant from demoting themselves. If you need to transfer admin rights, promote another user to Admin first, then change your own role.
Removing a User
Removing a user from the tenant immediately invalidates their session and any in-flight requests.

A confirmation prompt protects against fat-finger deletes. Once confirmed:
- The user's session token is invalidated server-side
- Any pending UI work they had in flight (unsaved edits, draft alerts) is dropped
- Audit-log entries the user wrote are preserved — their name still appears on history, but is marked as a removed user
To temporarily disable a user without deleting them (e.g., for vacation handoffs or sensitive periods), demote them to Viewer rather than removing the account.
Permission Scopes
Each role grants a set of permissions scoped to a particular action. The major scopes:
| Scope | What it controls |
|---|---|
project.applications | View applications and their telemetry |
project.custom_applications | Edit Custom Applications (glob rules) |
project.application_categories | Edit Application Categories |
project.alerts | Create / edit / delete alert rules |
project.integrations | Add / remove notification channels |
project.api_keys | Issue / rotate / revoke project API keys |
project.users | Manage users and roles |
project.settings | Edit project-level settings (retention, dashboards) |
For most teams the three built-in roles are enough. If you need a custom role for unusual access patterns, reach out to hello@codexray.io.
Audit Trail
Every change made through the UI — user added, role changed, application category edited, alert created — is recorded with the acting user's identity and a timestamp. The audit trail is available from Settings → Audit for Admin users, and is preserved for compliance review.
SSO and Role Mapping
When SSO is enabled, roles can be mapped automatically from your identity provider — a Microsoft Entra app role such as codexray.admin can be mapped to the Admin role in CodeXray. Roles are re-applied at every sign-in, so a change in your directory takes effect the next time the user signs in. This avoids manual user-by-user role assignment and keeps access in sync with your existing access management.
Configure mappings when you set up SSO.
Common Workflows
"Onboard a new SRE to the team"
- Settings → Users → + Add User
- Enter their email, name, and a temporary password
- Set role to
Editor(full visibility, edit access for alerts and categories — but not user/RBAC management) - Share the credentials via your secure channel
- New user logs in, changes their password from the user-menu
"Give a developer read-only access for an incident"
- Add the user as a
Viewerfor the duration of the incident - After resolution, either remove the user or keep the
Viewerrole for ongoing visibility
"Transfer admin responsibilities"
- Promote the new admin to
Adminfirst - Demote yourself to
Editor(or remove yourself entirely) - The platform will not allow demotion of the last
Admin, so step 1 must come first
"Disable a user temporarily"
Demote them to Viewer (their existing edits and alerts continue working, but they can't make new changes). Restore the role when they're back.
Next Steps
- Authentication & Multi-Tenancy — sign-in, tenants, projects, and API keys
- Application Categories — organise services so each role sees the right slice of your architecture
- Architecture — where the Auth Service handles RBAC enforcement